Coagulation and Flocculation: Essential Steps in Water Purification
Coagulation and Flocculation: Essential Steps in Water Purification
Coagulation flocculation water treatment is the frontline process that decides whether downstream filtration, membranes and disinfection will meet turbidity and DBP precursor targets. This article turns coagulation chemistry into practical decisions—coagulant and polymer selection, rapid mix and flocculation G and time ranges, jar testing and pilot methods, online control strategies, and common operational fixes. You will get specific chemical examples, measurable acceptance criteria, and troubleshooting steps you can apply during design, commissioning and routine operation.
Role of coagulation and flocculation in modern water and wastewater treatment
Key point: coagulation flocculation water treatment determines how well downstream units perform and how much operational pain you will accept. Good coagulation reduces filter loading, protects membranes from rapid fouling, and lowers the burden on disinfection by removing particle-associated organic matter; poor coagulation simply shifts problems downstream.
Primary removal goals and downstream consequences
Primary objectives: remove turbidity, suspended solids, color and particle-associated organics so filtration, DAF, membranes and disinfection can meet plant targets. The trade-off you always manage is chemical dose versus sludge volume and disposal cost. Increasing dose to chase lower UV254 or DOC will usually improve NOM removal but raises sludge production and may increase residual metal concentrations that complicate disposal.
Practical limitation: coagulation cannot replace poor upstream screening or a clogged clarifier. Design and operation must align – shear rates, detention times and hydraulic profiles in real clarifiers control whether lab successes translate to plant performance. Oversized or under-baffled flocculators produce fragile flocs that re-break in the clarifier.
Distinction by application: drinking water projects prioritize turbidity and DBP precursor control under regulatory targets; wastewater plants prioritize TSS, BOD/COD reduction and solids handling efficiency. Applying drinking-water chemistry or dose logic directly to municipal wastewater is a common mistake that increases polymer bills without consistent gains in settleability.
Concrete example: A midwestern municipal plant facing rising filter headloss switched from alum to polyaluminum chloride and adjusted flocculator staging. The change lowered required aluminum dose, reduced sludge volume at the belt press and extended filter run times, improving overall plant reliability without adding clarifier capacity.
Design choice trade-off: choose DAF when particles are low-density, fragile or hydrophobic and footprint is constrained; choose conventional sedimentation when solids load is high and sludge handling costs must be minimized. Picking the wrong clarifier type forces higher polymer use and frequent upsets.
Operational judgment: invest in adaptive controls and targeted online sensors only after you understand the plant response surface. Streaming current or turbidity-based control can cut chemical use, but these tools fail if operators have not validated setpoints with lab or pilot data and checked responses across seasonal raw water variability.
Good coagulation is not a single recipe – it is a systems decision that balances turbidity and NOM targets, sludge costs, and the real hydraulics of your plant.
Next consideration: evaluate whether your clarifier type, flocculation staging and chemical selection are tuned to deliver the specific downstream outcomes you need; if not, a targeted jar test and a short pilot trial focused on those outcomes is the appropriate next step. See the clarifier design considerations at clarifiers and sedimentation and confirm chemistry options via the US EPA Treatability Database.
Mechanisms and chemistry with specific chemical examples
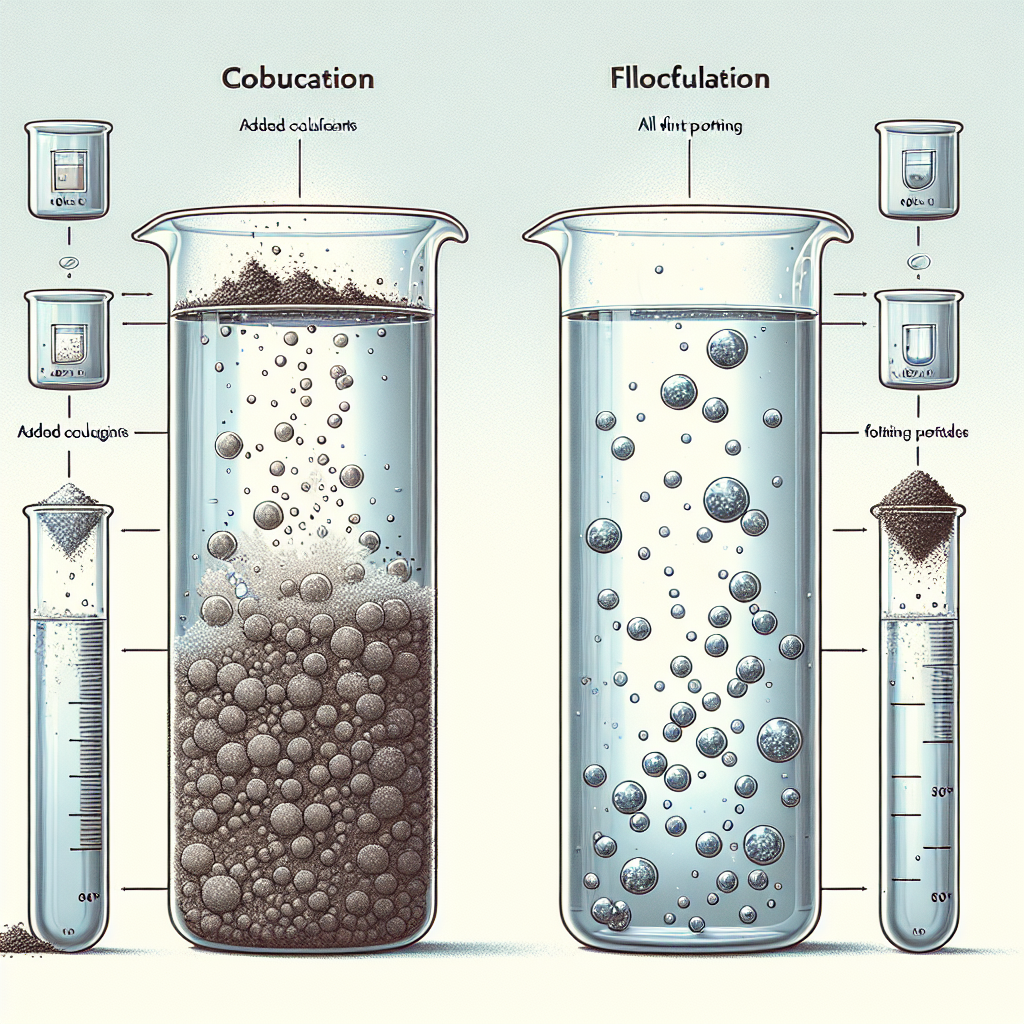
Key point: coagulation reactions fall into two practical categories: charge neutralization of colloids and sweep flocculation by precipitated hydroxide networks, and your coagulant choice determines which dominates in the basin.
How the chemistry maps to operational behavior
| Coagulant | Dominant mechanism | Typical pH window | Practical trade-off |
|---|---|---|---|
| Aluminum sulfate (alum) | Charge neutralization, some sweep at high dose | 5.5 to 7.5 | Low material cost but consumes alkalinity and produces bulky aluminum-rich sludge |
| Ferric chloride | Strong charge neutralization + hydrolysis; good for color/NOM | 5.0 to 8.0 | Effective over wider pH but can acidify water and raise residual iron |
| Polyaluminum chloride (PACl) | Polymeric hydrolysis species that enable sweep flocculation | 6.5 to 8.5 | Often lower dose/sludge than alum, higher product cost and pH sensitivity for optimal species |
| Cationic polyacrylamide (PAM) / polyDADMAC | Adsorptive bridging and charge patching as flocculant or coagulant aid | Used across pH with appropriate charge density | Reduces sludge volume and improves dewatering; overdose causes brittle flocs |
| Chitosan (natural polymer) | Bridging and charge neutralization (cationic at neutral pH) | 6.0 to 7.5 | Biobased option with narrow application window and variable source quality |
Practical insight: you can infer the dominant mechanism during jar tests by watching dose-response and floc traits. If turbidity drops sharply at low dose and flocs are small and dense, charge neutralization is likely; if removal improves progressively with higher dose and heavy, jelly-like flocs appear, sweep flocculation is contributing.
- Diagnostics during jar tests: note pH after dosing (alum will lower pH), measure UV254/DOC to see NOM removal, and evaluate settleability and SVI of settled flocs.
- Zeta potential caveat: zeta measurements help but often mislead operators when mixed hydrolysis species exist; treat zeta data as supportive, not definitive.
- Temperature and kinetics: lower temperatures slow hydrolysis and bridging — expect higher doses and longer flocculation times in winter.
Concrete example: a surface-water utility with low alkalinity and seasonal algal precursors switched to a ferric-based program during high-color months. Ferric chloride reduced color and UV254 more effectively than alum, but plant operators had to add lime after the clarifier to recover alkalinity and prevent low-pH downstream corrosion; sludge iron content also increased disposal costs.
Judgment: polymeric coagulants and cationic flocculants usually deliver operational benefits that justify their price for plants chasing lower sludge volumes or better filter runs, but they require supplier-specific bench tests and careful control to avoid overdosing. Natural coagulants work in niche cases but are not a plug-and-play replacement for inorganic coagulants in full-scale plants.
Knowing whether you are neutralizing charge or building a sweep is not academic — it dictates coagulant selection, downstream pH control, sludge character and the polymer strategy you will use for dewatering.
Coagulant and flocculant selection with vendor and product examples
Start with the water, not the catalog: choose coagulants and flocculants based on your raw-water matrix and the specific downstream objective — turbidity reduction, NOM/UV254 control, filter protection or sludge minimization. In practice this means mapping pH, alkalinity, seasonal NOM shifts and temperature to a shortlist of chemistries, then validating with jar tests and a short pilot run.
Practical trade-off: inorganic coagulants (alum, ferric chloride, ferrous sulfate, PACl) are predictable on charge neutralization and sweep flocculation but differ in alkalinity demand, residual metal and sludge character. Polymeric flocculants from major suppliers reduce sludge volume and improve dewatering, yet they raise chemical cost and require tight dosing control or you will make brittle flocs that pass filters or foul membranes.
Vendor and product-class examples to consider
- Coagulant classes (commercial sources): aluminum sulfate and ferric chloride are widely available through chemical distributors; Polyaluminum chloride (PACl) formulations from major suppliers are often sold under product families and vary by basicity — insist on PACl spec sheets and basicity data.
- Polymeric flocculants (suppliers): SNF, Kemira and Solenis supply cationic, anionic and nonionic polyacrylamides with varying molecular weight and charge density; request sample polymers with known charge density and do bench dewatering tests with your sludge.
- Specialty aids and blends: powdered activated carbon or silica-based coagulant aids are sold as add-ons for NOM or microcontaminant adsorption; vendors will often propose blended coagulant + polymer programs — test blends before rollout.
- What to ask vendors for: material safety data sheets, product basicity/active solids, recommended dosing ranges, and representative jar-test or pilot-case studies for similar raw water. Do not accept generic dosing tables as a substitute for side-by-side testing.
Concrete example: an industrial wastewater treatment plant with high oil-and-grease and fine suspended solids trialed a ferric program with a cationic PAM from a major polymer supplier. The ferric improved initial settling of colloidal fines while the cationic polymer brought sludge cake solids up during centrifuge conditioning, cutting centrifuge runtime and polymer consumption over time — but operators had to re-sequence feed points to avoid premature polymer-coagulant interactions.
Selection nuance that matters: polymer and coagulant compatibility is often overlooked. Order of addition, contact time and shear change performance. In full-scale trials, test both coagulant-then-polymer and polymer-then-coagulant sequences, and vary rapid-mix energy — results can flip depending on whether your polymer acts primarily by bridging or charge neutralization.
Vendor samples and a documented jar-test matrix are non-negotiable. Insist on samples, run a dose vs pH vs polymer matrix, and link the winning recipe to pilot confirmation before changing bulk procurement.
Next consideration: once you shortlist chemistries, run controlled jar tests and short pilots; capture treated turbidity, UV254/DOC, settleability and dewaterability metrics, then hard-link the chosen chemistry to your control strategy. For jar-test protocol guidance see the jar testing and pilot studies page and verify coagulant behavior against the US EPA Treatability Database.
Design and operational parameters for rapid mix, flocculation and clarification
Hard rule: rapid mix must disperse coagulant quickly without subjecting forming flocs to excessive shear. Use rapid mix energy to achieve chemical contact and hydrolysis, then step down to gentle conditions for floc growth and consolidation. Typical practical targets are rapid mix G = 200–1,000 s^-1 for 10–60 seconds and staged flocculation with G decreasing from ~60–80 s^-1 down to 20–30 s^-1 over 10–30 minutes, but these are starting points — validate with jar tests and pilots.
Translating lab G and time to full-scale basins
Do not assume jar-test timings map directly to basin volumes. The objective is to match energy dissipation rate and the residence time distribution experienced by particles. In practice that means matching power-per-volume or tip-speed characteristics of mixers, preserving the same order-of-magnitude shear during rapid mix, and reproducing staged, low-shear pockets for polymer bridging. If you cannot match mixer geometry, use a conservative increase in detention time and add an extra low-speed stage rather than increasing shear.
- Mechanical checks: verify mixers deliver specified torque at design speed and that baffles prevent short-circuiting.
- Feed sequencing: inject coagulant into the highest-shear rapid-mix zone; place polymer feed into the first low-shear flocculation stage or immediately upstream of the clarifier feed well depending on polymer chemistry.
- Hydraulic layout: avoid long, narrow channels without baffling; they create uneven shear fields and fragile flocs.
- Shear management: design paddle or hydraulic flocculators to allow speed staging and quick shutdowns for upset management.
Practical limitation: longer detention is not a cure for poor mixing. Oversized or poorly baffled flocculation basins commonly produce weak, easily disrupted flocs — you trade controlled growth for unpredictable hydraulics. If plant space forces long basins, subdivide them into multiple compartments with adjustable mixing so you can tune shear independently of volume.
Concrete Example: A 50 ML/d surface-water plant had intermittent carryover during spring blooms. Engineers reduced rapid-mix intensity from a high setting that fragmented forming flocs and added a two-stage flocculator: a moderate 40 s^-1 stage for 8 minutes followed by a 22 s^-1 polishing stage for 12 minutes. Result: filter influent turbidity dropped 30% and polymer use for sludge conditioning fell, with no clarifier footprint change.
Performance indicators and commissioning acceptance
Set KPIs tied to downstream goals, not abstract numbers. Useful metrics: treated turbidity at clarifier effluent, percent reduction in raw turbidity, floc-settleability (30-minute settled solids), sludge volume index for clarifier sludge, and polymer dose for dewatering. For plants feeding direct filtration, aim to meet the filter influent turbidity that achieves required run lengths (for many plants this is on the order of tenths of an NTU); define that target before tuning G and detention.
Match mechanical staging to chemistry: bridging polymers need long, low-shear polishing; sweep flocculation tolerates somewhat higher shear but increases sludge mass.
Jar testing and pilot evaluation: procedures, metrics and decision rules
Start with an objective: run jar tests and pilots to answer specific operational questions — what coagulant and polymer hit your treated turbidity and UV254 targets, what dose gives acceptable sludge characteristics, and how robust is that recipe across raw water swings. Treat the laboratory as hypothesis testing, not dosing folklore.
Practical jar test workflow
Prepare a test matrix: design side by side tests that vary coagulant type, coagulant dose, polymer type and polymer dose, and at least one pH adjustment. Replicate critical points so you can see variability. Record raw turbidity, temperature, alkalinity, UV254 or DOC, and conductivity for each sample.
- Step 1: collect representative samples during the condition of interest and keep them chilled to avoid biological change
- Step 2: run a dose matrix with 4 to 8 coagulant doses and 2 polymer doses where applicable; include a zero-dose control
- Step 3: apply the plant relevant mixing sequence in the jar tester and allow staged settling; take effluent samples from a fixed height
- Step 4: measure treated turbidity, UV254 or DOC, and quick settle metrics at early and late times to judge both immediate clarity and slow settling behavior
- Step 5: evaluate settled solids compressibility and small-scale dewatering with a bench press or centrifuge if sludge handling is a driver
Key metrics and decision rules: prefer the lowest coagulant dose that consistently meets treated turbidity and UV254 targets while producing settled solids that compress and dewater without excessive polymer. Add a safety margin of 10 to 20 percent to lab dose for initial full-scale startup to cover hydraulic and mixing mismatches. If sludge SVI or dewaterability worsens above a dose, stop increasing coagulant and instead trial a polymer aid.
Limitation and tradeoff: jar tests do not reproduce full-scale shear fields or residence time distributions. Small basins, baffling, and mixer geometry change outcomes. Rely on a short pilot when raw water variability is high, the chemistry is novel, or sludge disposal costs could negate chemical savings.
Field example: a coastal utility trialed PACl and a cationic polymer in the lab and selected a midrange PACl dose that met turbidity and UV254 goals. A two week pilot feeding a 1 m2 lamella clarifier showed the same dose left a denser, more pumpable sludge than the alum baseline, cutting belt press polymer demand by about 30 percent and lowering solids disposal weight. The plant then used the pilot report to justify a procurement change.
Laboratory to plant discipline: always document jar-test conditions, raw-water metadata and replication. Use those records to set initial full-scale setpoints and to calibrate online controls later.
Next consideration: after selecting a candidate recipe from jars, run a pilot that reproduces plant feed arrangement, measures clarifier effluent turbidity and sludge dewatering performance for multiple raw water states, and produces a short procurement specification packet. For pilot protocol templates see the jar testing and pilot studies guidance and validate species behavior with the US EPA Treatability Database.
Instrumentation, automation and online control strategies
Immediate point: instrumentation is not optional if you expect stable performance from coagulation flocculation water treatment; without the right sensors and control logic you will be reacting to failures instead of preventing them.
Sensor selection matters: combine raw-water turbidity, treated turbidity, online pH, and a NOM surrogate such as UV254 rather than relying on a single signal. Turbidity is fast and cheap; UV254 gives a read on particle-associated organics; pH and conductivity detect chemistry shifts that change coagulant efficacy. Use Hach turbidity analyzers and industrial pH probes from Endress+Hauser or ABB as practical, serviceable examples.
Control architectures and trade-offs
Feed-forward control: increases coagulant proportionally to raw turbidity spikes and is quick to respond, but it assumes turbidity correlates with treatability. That assumption fails when NOM or particle character change, producing over- or under-dosing. Closed-loop control using treated turbidity or streaming current tightens dosing to what the clarifier actually delivers, but closed loops are slower and can oscillate without proper tuning. Hybrid schemes that use feed-forward for immediate adjustment and closed-loop for steady-state trimming deliver the best practical balance most plants can achieve.
- Practical limitation: streaming current detectors react to charge balance but do not measure sweep flocculation effectiveness or settled solids; always calibrate them against jar-test endpoints and periodic lab turbidity/UV254 checks.
- Maintenance trade-off: online UV254 and turbidity sensors reduce lab load but need regular cleaning, verification, and spares budget — otherwise your control system will be running on bad data.
- Operational safeguard: implement manual override, bumpless transfer between automatic and manual modes, and alarm thresholds that trigger root-cause checks, not just dose changes.
Concrete example: a medium-sized drinking-water plant installed an automated scheme where raw turbidity fed a proportional coagulant setpoint and treated-turbidity closed-loop trimmed dose with a 5-minute integrator. During a summer algal bloom the plant observed raw turbidity spikes that initially triggered higher coagulant feed; the closed-loop then reduced dose as treated turbidity responded, saving roughly 18% chemical use over the bloom peak compared with a feed-forward-only approach. Operators retained a jar-test-derived conservative dose floor to prevent underdosing during sensor fouling.
Judgment you should act on: do not treat online control as a cost-cutting automation project alone. Savings come from pairing sensors with validated lab-to-plant relationships, conservative safety margins taken from jar tests or pilots, and governance that keeps operators in the loop. Over-automation without those anchors increases risk and hidden costs.
Calibrate sensors to jar-test outcomes and pilot data; treat streaming current and UV254 as indicators that require lab confirmation, not replacements for it.
Next consideration: after you pick sensors and a control scheme, budget for routine verification, spare parts, and periodic pilot checks across seasons so your automation saves chemicals without increasing operational risk.
Operational troubleshooting and sludge management
Straight to the point: most plant upsets that look like chemistry failures are actually problems with feed points, shear, or polymer application. Start troubleshooting where hydraulics meet chemistry rather than adding more coagulant; uncontrolled mixing and poor polymer feed sequence destroy flocs faster than chemistry can build them.
Quick stabilization workflow: when you see carryover or sudden dewatering failure, follow a short, repeatable sequence to stop the bleed and gather evidence before changing recipes.
- Step 1: hold automatic dose and revert to a jar-test-derived conservative dose floor so you do not oscillate chemical feed while diagnosing
- Step 2: sample raw and clarifier influent and effluent for turbidity, pH, alkalinity and temperature; note polymer lot and feed pressure
- Step 3: verify mixer speeds and baffling for short-circuiting; reduce rapid-mix intensity if floc fragmentation is suspected
- Step 4: run two quick jar tests on-site: current plant sample and a comparison with the previous working recipe; record settleability and floc strength
- Step 5: inspect polymer lines, mixers, and feed timing; if polymer is suspected, run incremental bench dosing for cake solids and filtrate clarity
Practical trade-off: pumping up polymer dose will often recover dewatering temporarily but masks upstream issues. Polymer can improve cake dryness at the press or centrifuge, but relying on polymer to fix poor coagulation or hydraulic design transfers cost to consumables and complicates disposal.
Sludge management priorities: condition sludge for dewatering, reduce volume before transport, and protect the dewatering train with consistent feed quality. Choose conditioning approach by worst-case sludge behavior, not average samples; test for compressibility (CST), rheology and filtrate quality when selecting polymer chemistry and dose.
Equipment and disposal trade-offs: belt presses are robust and economical on a schedule but need well-conditioned sludge; centrifuges handle variable feed but have higher energy and maintenance. Consider centrate management costs and regulatory limits for metals or residual coagulant when comparing solutions. A lower chemical spend that multiplies haulage or centrate treatment is not a saving.
Concrete example: A coastal treatment plant moved from intermittent polymer slugging to continuous low-dose conditioning introduced upstream of the centrifuge feed well. That operational change stabilized cake solids, reduced truck cycles and revealed that earlier variability was driven by a failing polymer metering pump rather than a coagulant failure. The operator documented bench CST curves before and after the change to justify polymer procurement.
Judgment call most operators miss: optimize the coagulation-flocculation hydraulic profile first, then solve residual sludge issues with targeted polymer conditioning. Jumping to a different coagulant because you see a sticky sludge usually wastes time and money.
If sludge disposal costs or regulatory limits drive decisions, quantify them up front. Choose chemistry and conditioning based on lifecycle cost: chemicals, dewatering energy, centrate treatment and haulage.
Frequently Asked Questions
Short answer first: streaming current and online turbidity are powerful operational signals but they do not replace lab validation. Use online signals for trending and closed-loop trimming only after you have correlated those signals to jar-test endpoints and periodic pilot checks.
How to pick a coagulant in practice: base the shortlist on the raw-water matrix—pH, alkalinity, NOM character and temperature—then run a focused matrix of bench tests. Practical trade-off: cheaper inorganic salts can work but frequently increase sludge mass or alkalinity demand; polymeric coagulants or PACl often lower sludge handling costs at higher chemical price, so compare lifecycle costs not just material cost.
Jar-test endpoints that matter on the plant: prioritize the measurements tied to your downstream constraint — filter influent turbidity or UV254 reduction if DBP precursors are critical, and settled solids compressibility if sludge disposal is driving decisions. Do not select a dose simply because it gives the clearest jar supernatant; confirm settleability and dewaterability before committing.
Temperature and seasonality: when water cools, kinetics slow and polymers bridge less effectively. Operational levers that work: lengthen low-shear detention rather than increasing rapid-mix energy, and schedule targeted jar tests during cold-water conditions to reset control setpoints.
When is a pilot required: require a continuous or semi-continuous pilot when raw-water variability is large or when projected chemical savings could be offset by increased sludge disposal. Pilots uncover feed-point interactions, clarifier hydraulics and polymer-coagulant sequencing problems that jars cannot reveal.
Concrete example: A medium-sized surface-water utility used a short pilot to test a PACl + cationic polymer program after jars showed promising turbidity and UV254 results. The pilot reproduced clarifier hydraulics and revealed a modest coagulant reduction plus significantly firmer sludge cake at the belt press, which justified the higher chemical unit cost in procurement discussions.
Common misunderstanding: many teams believe the lowest jar-test turbidity equals the best full-scale recipe. In practice that often produces heavy, poorly dewatered sludge or fragile flocs that break in the clarifier. Focus on the operational objective you need to protect and weight jar-test metrics accordingly.
Concrete actions to implement this week: 1) schedule a chilled raw-water sample during the next representative condition and run the 3-by-3 matrix; 2) calibrate your streaming current or turbidity setpoints against those lab endpoints; 3) if sludge costs dominate procurement, budget a 2-week pilot that includes dewatering runs and clarifier effluent monitoring. Put the results and chosen setpoints into your SCADA change-control packet before any chemistry swap.